The success of a project depends on multiple factors – a good team, effective resource allocation, proper risk management strategies, and on and on. But, before all this, the project outline ignites the spark.
Without it, the roadmap to achieving your goals could become unclear, leaving you vulnerable to going off track.
So, knowing how to create a project plan outline is pretty important – which is what I’ll be helping you with.
Also, you’ll need a project management system to get the best results. Just in case you’re new to project management, here’s a quick video to help you get started
What Is a Project Outline?
Simply put, a project outline is a document that serves as a planning and communication tool to help define a project’s –
- Goals
- Deliverables
- Tasks
- Timeline
- Resources
It is used to guide team members, stakeholders, and decision-makers in understanding the scope and objectives of the project.
This level of pre-planning ensures everyone is aligned on priorities and expectations, ultimately preventing confusion and wasted time.
A few of the action items to create an outline of a project may include:
- Defining the project scope
- Defining the project deliverables
- Setting a fixed timeframe for completion of the project
- Identifying potential risks and challenges during project execution
- Measuring resource requirements
How to Write a Project Outline
As someone who hasn’t managed projects earlier, it’s normal to feel slightly overwhelmed when writing an outline.
Where do I start?
What should I cover?
What should I absolutely not forget to talk about in the outline?
The step-by-step guide below will help you overcome these challenges and more.
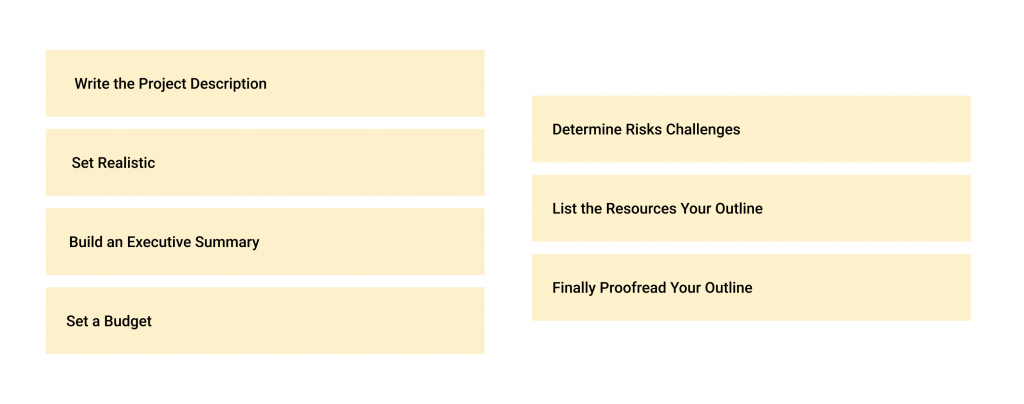
Step 1: Use a Project Management Platform
If you’ve been working as a project manager/team leader for quite some time, you’d understand why ditching the spreadsheet-and-doc life for a reliable project management system is necessary.
Here’s a list of some of the most apparent benefits of using such a tool –
- A project management platform makes every project-related information accessible from a single dashboard.
- It bridges communication gaps between the team with collaboration features like file-sharing, task comments, @mentions, etc.
- Most project management software like ProProfs Project is cloud-based, ensuring access at any time and anywhere.
- Reports and analytical data work wonders when developing risk management strategies.
- You can generate client invoices, bills, and estimates (in fact, automate them through add-ons)

(Image source: ProProfs Project)
Related post: 20 Best Project Management Software for Sure-Shot Project Success
Step 2: Define Your Project Goals & Objectives
Step number two has to be building the foundation of the project. You can start by asking questions like –
- What are we aiming to achieve?
- What are our goals and objectives?
But here’s some pro advice – Always ensure you have specific and measurable items.
I’ve seen a lot of inexperienced project managers, and team leads using vague statements like – “improve customer satisfaction,” “finish the project within deadline”, etc.
The problem with such statements is that the project remains unclear to the team. That’s why it’s important to aim for SMART goals: Specific, Measurable, Achievable, Relevant, and Time-bound.
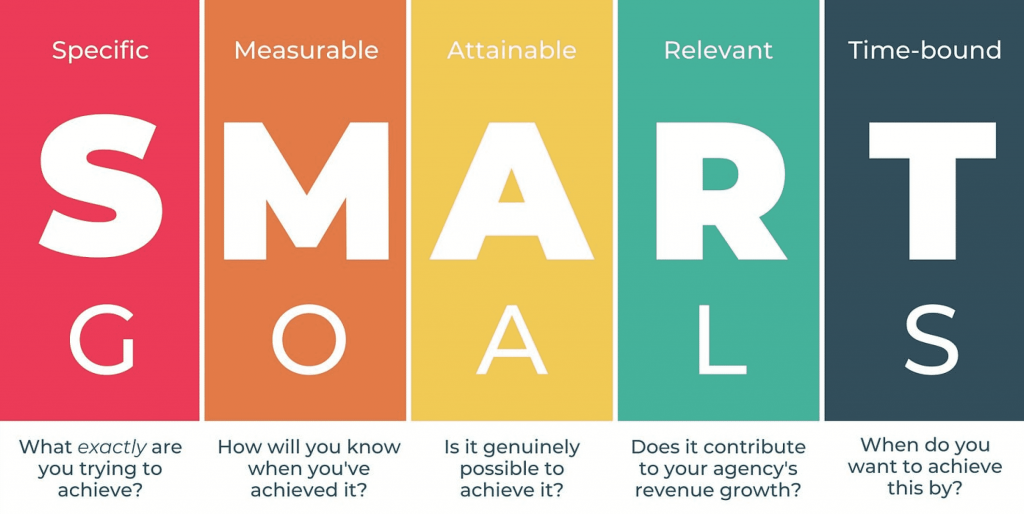
For instance, a well-defined goal could be “Increase customer satisfaction scores by 10% within the next quarter, as measured by our annual customer satisfaction survey.”
Step 3: Identify Stakeholders & Assign Roles
Who are the invested individuals and groups that could impact or be impacted by your project? These are your stakeholders.
So, why is stakeholder analysis crucial?
Understanding their roles, influence, and expectations early on helps in tailoring communication. You have more clarity over what they actually want from the project.
Below is a brief guide to identifying stakeholders and assigning them roles. Please understand that these may vary from one project to another.
Shortlisting:
Gather your project team and brainstorm a list of individuals interested in the project’s outcome. This can include:
- Internal Stakeholders: Project team members, department heads, executives, IT department (if applicable), and legal department (if applicable).
- External Stakeholders: Clients, customers, vendors, suppliers, regulatory bodies, and community groups (depending on the project).
Prioritizing:
Next, you need to categorize them based on their level of influence and interest in the project. For example –
- High-influence stakeholders may have the power to approve or veto project decisions
- High-interest stakeholders may be directly affected by the project’s outcome
Defining Roles & Responsibilities:
Lastly, match stakeholder expertise and interests with specific roles within the project. Here are some common stakeholder roles:
- Project Sponsor: Supports the project and provides financial backing.
- Project Manager: Leads the project team and ensures project completion within scope, time, and budget.
- Team Members: Contribute their skills and expertise to complete project tasks.
- Subject Matter Experts (SMEs): Provide specialized knowledge and guidance on specific aspects of the project.
- Client/Customer: Approves project deliverables and provides feedback.
Step 4: Scope out the Project Deliverables
Defining what’s in and what’s out of your project scope is crucial to prevent scope creep. Figure out what tangible outputs your project will produce. This could be a finished product, a completed service, a report, or any other deliverable that signifies project completion.
Be clear about what will be delivered and, equally importantly, what won’t. Limitations can include budget constraints, time restrictions, or resource availability.
Read More: Project Scope: How to Define & Manage It Like a Pro
Step 5: Develop a Project Timeline & Schedule
Now that you know your goals, deliverables, and team, it’s time to map out the project journey. If you’ve worked on projects before, you probably understand how a well-defined timeline helps visualize the project flow, identify potential roadblocks, and ensure timely completion.
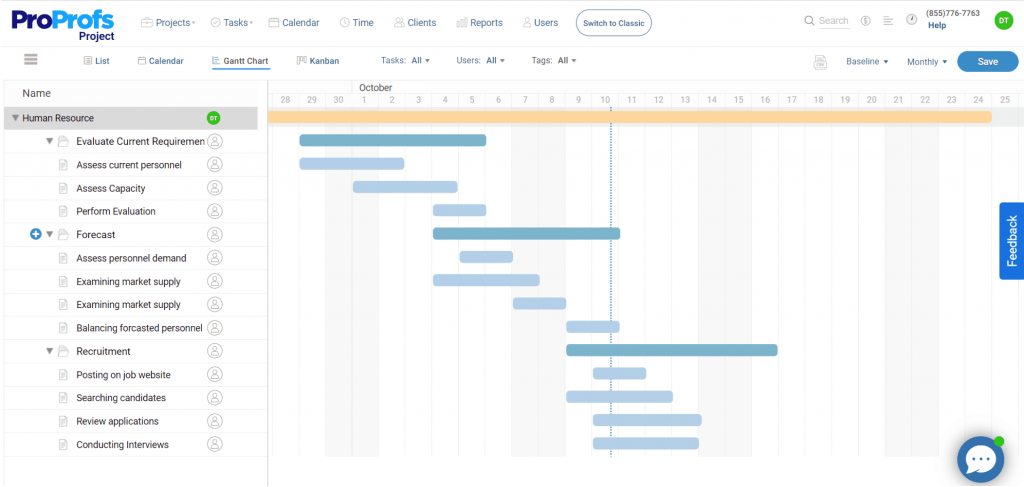
This is one of those sections of the project outline where working with a software solution is going to ease things for you. How? Here you go –
- Break down tasks into smaller chunks: Using a task management tool, you can divide each project deliverable into smaller, manageable subtasks.
- Estimate task duration: Estimate the time required for completion, considering factors like team member availability, task complexity, and potential dependencies.
- Sequence tasks: Determine the order in which tasks need to be completed. Are there any tasks that must be finished before others can begin? This is where project dependencies come into play.
- Schedule tasks: Assign specific start and end dates for each task. Consider using a Gantt chart to visualize your schedule.
- Keep buffer time: It’s a wise idea to build in some buffer time for unforeseen delays, ensuring the project remains on track even when hiccups occur.
- Allocate resources: Use a resource planning tool to match required resources (e.g., personnel, software, equipment) with specific tasks.
Read more: How to Build a Project Timeline in 6 Simple Steps
Step 6: Devise a Risk Management Plan
At some point, every project manager comes to the bittersweet conclusion that no project is without risks. The key is to anticipate potential risks and have a plan in place to address them. Thinking about managing risks from the project outline stage works as a proactive approach that can save significant time and resources later on.
Now, let’s talk about what you need to do.
#1 Brainstorm potential risks: Gather your project team and list down potential issues that can derail your project. Some examples can be resource limitations, technical glitches, external dependencies, and unforeseen market changes.
#2 Assess risks: Evaluate the likelihood of each risk occurring and the potential impact it could have on the project’s success. Tools like a risk matrix can help prioritize risks based on severity and probability.
#3 Develop mitigation strategies: Formulate a plan to address each identified risk. Mitigation strategies could involve having a backup plan, allocating additional resources, or securing early stakeholder buy-in to minimize potential roadblocks.
Read more: How to Overcome Risks Using a Comprehensive Risk Management Plan
Step 7: Establish Communication Channels
You can’t have a compromised communication system when working on projects with a diverse team and stakeholders. This is a must-have to keep everyone informed and aligned throughout the project lifecycle.
While a project management platform offers decent communication and team collaboration features, in some cases, you may need additional support. Here’s what you need to do –
- Identify communication channels: Choose what best suits your project needs and team preferences. This could include email, project management software, video conferencing tools, team collaboration platforms, etc.
- Define communication frequency: Project team members may require daily updates, while senior management might be satisfied with weekly or bi-weekly progress reports.
- Define communication roles: Assign communication ownership for different project aspects.
For example, a team lead might be responsible for internal team communication, while the project manager handles updates with external stakeholders.
Read More: 10 Surefire Ways to Improve Team Communication
Who Should Create a Project Outline?
While this may vary across organizations, usually, it’s the project manager or someone who’s in charge of the project.
The reason is simple.
It should be a person who has a clear understanding of the scope and objectives of the project, the timeline in which it needs to be completed, and the resources available that can be deployed towards completing it.
On top of that, the project manager is also responsible for managing risks in the project. And that means he has a better idea than anyone else regarding budgeting, timelines, and resource allocation, as well as design strategies for measuring success.
Read More: How to Become a Project Manager and Succeed in the Business World
What Are the Benefits of Using a Project Outline?
A well-designed project outline can make a significant difference in the outcome of a project. Have a quick glance at some of the top benefits –
- Reduced Confusion & Frustration
Imagine team members scrambling to understand project expectations or duplicating efforts due to unclear task assignments. That’s a recipe for disaster.
A detailed outline eliminates ambiguity, provides clarity on individual roles and responsibilities, and minimizes confusion and frustration within the team.
- Improved Time Management
A project outline with defined deadlines for tasks empowers team members to manage their time effectively. They can prioritize tasks, allocate time accordingly, and avoid last-minute rush to meet deadlines.
- Clearer Visibility Into Project Progress
A detailed outline outlining milestones and deliverables gives team members a transparent view of the project’s overall progress. This fosters a sense of accomplishment as they complete tasks and milestones, boosting morale and motivation.
- Enhanced Collaboration & Teamwork:
A well-defined outline promotes a collaborative environment by highlighting task dependencies and illustrating how individual contributions fit into the bigger picture. This encourages team members to communicate effectively, support each other, and work together towards shared goals.
- Reduced Risk of Scope Creep:
Project scope creep – the uncontrolled addition of features or tasks – can derail projects and budgets. A project outline acts as a safeguard, clearly defining project boundaries and deliverables. By referring back to the outline, team members can identify potential scope creep early on, preventing unnecessary work and ensuring project focus remains on core objectives.
A Project Outline Example
| Category | Details |
| Project Name | XYZ Office Building Renovation |
| Project Goal | To renovate the XYZ office building to create a modern, functional, and collaborative workspace for employees by [Target Completion Date]. |
| Project Objectives | Secure all necessary permits and approvals by [Date].Finalize architectural plans and specifications by [Date].Award construction contracts by [Date].Complete demolition and abatement work by [Date].Complete construction of new walls, ceilings, and flooring by [Date].Install all new electrical, plumbing, and HVAC systems by [Date].Complete all painting, finishes, and furniture installation by [Date].Conduct final inspections and obtain occupancy certificate by [Date]. |
| Stakeholders | Internal Stakeholders:Project Sponsor (XYZ Company CEO)Project ManagerProject Team (Architects, Engineers, Interior Designers)IT Department (for technology integration)Facilities Department (for ongoing maintenance)External Stakeholders:General ContractorSubcontractors (Electrical, Plumbing, HVAC, etc.)Building InspectorateArchitects and Engineers (consultants)Furniture Vendors |
| Deliverables | Approved building permits and approvalsFinal architectural plans and specificationsSigned construction contractsCompleted demolition and abatement workNew walls, ceilings, and flooring construction completeInstalled electrical, plumbing, and HVAC systemsCompleted painting, finishes, and furniture installationFinal inspection reports and occupancy certificate |
| Timeline and Schedule | Pre-Construction Phase (1 Month): Secure permits, finalize plans, award contracts.Demolition and Abatement (2 Months): Remove existing elements and hazardous materials.Construction Phase (4 Months): Build new walls, ceilings, and floors, and install new systems.Finishing Phase (2 Months): Painting, finishes, furniture installation, and final inspections.Project Handover (1 Week): Final walkthrough, documentation handover, and facility cleaning. |
| Risks and Mitigation Strategies | Risk: Delays in obtaining permits. Mitigation: Expedited permitting process, early application submission.Risk: Cost overruns due to unforeseen structural issues. Mitigation: Thorough pre-construction inspection and contingency budget allocation.Risk: Labor shortages or material delays.Mitigation: Secure contracts with reliable contractors and establish buffer periods in the schedule.Risk: Accidents or injuries on the construction site. Mitigation: Implement a comprehensive safety plan and enforce safety protocols. |
| Communication Plan | Weekly project meetings with all project stakeholders.Bi-weekly status reports sent to the project sponsor and key stakeholders.Daily communication between the project manager and construction team.Online project management platform for document sharing and communication. |
| Budget | A detailed budget breakdown will be included in the final project outline, outlining costs for labor, materials, permits, equipment rentals, and professional services. |
Create an Effective Project Outline With ProProfs Project
Having read so far, I can expect that you now possess a fair enough understanding of what a project outline is, how to create one, why you should create one, and so on.
Working on a project outline can seem intimidating at the start, especially if you don’t have the right tools. And by tools, I mean a project management system.
I understand that certain people who have always used spreadsheets and docs think – what’s the point of investing in software, anyway?
But only when you use it do you get to realize what convenience you were previously missing. For example, as someone who has been using ProProfs Project for almost over a year now, I can vouch for its task management tool, project progress views, and reports. I believe it’s one of the best software solutions startups or SMBs can go for.
Still skeptical whether you should invest in a project management platform? Why don’t you try it yourself?
ProProfs Project offers a freemium plan. Try it out if you want to consistently drive positive results with upcoming projects.
FREE. All Features. FOREVER!
Try our Forever FREE account with all premium features!
